Honeypot using Raspberry Pi & Opencanary
What is honeypot & opencanary?
Honeypot
A honeypot is a security mechanism designed to deceive and detect unauthorized access or attacks on a network by simulating vulnerable systems or services. The primary purpose of a honeypot is to attract and trap attackers, allowing security professionals to study their tactics, techniques, and procedures (TTPs), as well as gather threat intelligence. Honeypots come in various forms, ranging from low-interaction honeypots, which simulate certain services without real system involvement, to high-interaction honeypots that emulate complete systems.
OpenCanary
OpenCanary is an open-source honeypot framework that simplifies the deployment and configuration of honeypots. It is designed to mimic various services and protocols to attract potential attackers and log their activities. OpenCanary is written in Python and is customizable, allowing users to define the services they want to emulate and the types of events they want to log. It is widely used for research, threat detection, and gaining insights into the tactics used by attackers.
Key features of OpenCanary include:
- Customizable Services: OpenCanary allows users to emulate a variety of services, such as SSH, HTTP, SMB, and more. Users can configure which services to run based on their specific needs.
- Logging and Alerting: The framework logs various events and interactions, helping users analyze the behavior of potential attackers. It also supports alerting mechanisms, such as email notifications, to notify administrators of suspicious activities.
- Integration with SIEM Systems: OpenCanary can be integrated with Security Information and Event Management (SIEM) systems, allowing for centralized monitoring and analysis of honeypot data.
- Diverse Deployment Options: OpenCanary can be deployed on different platforms, including Raspberry Pi, making it accessible and cost-effective for various users.
- Community Support: Being open-source, OpenCanary benefits from a community of users and contributors who actively contribute to its development and share insights on threat intelligence.
Why companies use honeypot?
Companies use honeypots as a cybersecurity strategy to lure and trap cyber attackers, acting as decoys that mimic real systems, networks, or data. Honeypots are designed to be attractive targets, deliberately containing vulnerabilities to attract hackers. When attackers interact with a honeypot, their techniques, tools, and behaviors can be monitored and analyzed without risking actual data or systems. This intelligence allows companies to better understand potential threats, improve their defenses, and sometimes even identify the attackers. By acting as early warning systems, honeypots help companies preemptively bolster their security measures, making them an essential component in a comprehensive cybersecurity strategy. Here are some key reasons why companies deploy honeypots:
- Early Threat Detection
- Understanding Attack Techniques
- Threat Intelligence Gathering
- Incident Response Preparation
- Evaluation of Security Posture
- Security Awareness and Training
- Research and Collaboration
- Strategic Deception
- Legal and Ethical Deterrent
- Compliance Requirements
Setting up Raspberry Pi as opencanary honeypot
- Setup Raspberry Pi.
- Install & configure Opencanary on Raspberry Pi.
- Configure auto start opencanary on boot.
Setup Raspberry Pi
Before setting up the Raspberry Pi. Below is the list of tools we need in order to setup.
- Raspberry Pi 4 ( 4 or higher is recommended but 3/3b will also work)
- Raspberry Pi power supply
- Micro SD card (16 GB or higher)
- Ethernet cable (optional)
After gathering all the required tool we can setup the raspberry pi for opencanary. Below are the step-by-step instructions to set up a Raspberry Pi for OpenCanary:
Step 1: Go to the official Raspberry Pi website and download the “Raspberry Pi Imager” tool according to your OS.
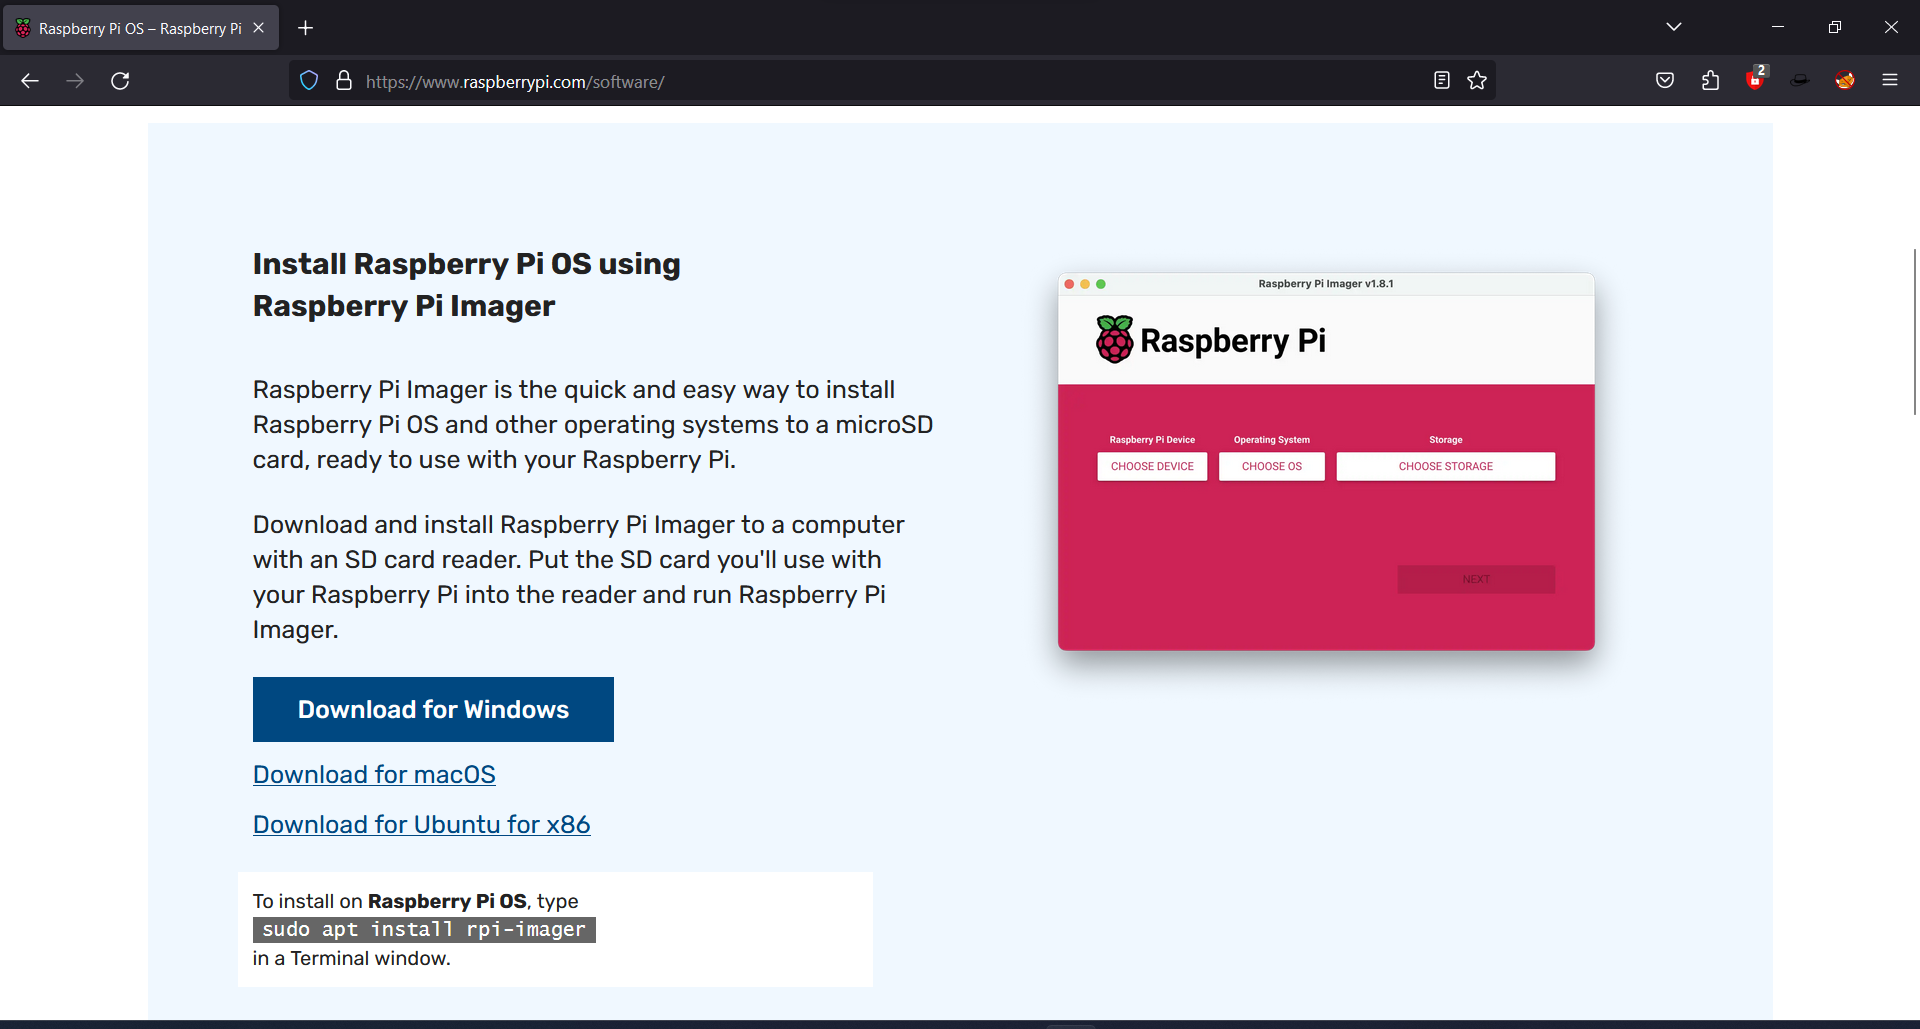
Step 2: Install the raspberry pi Imager as normal software we install usually.

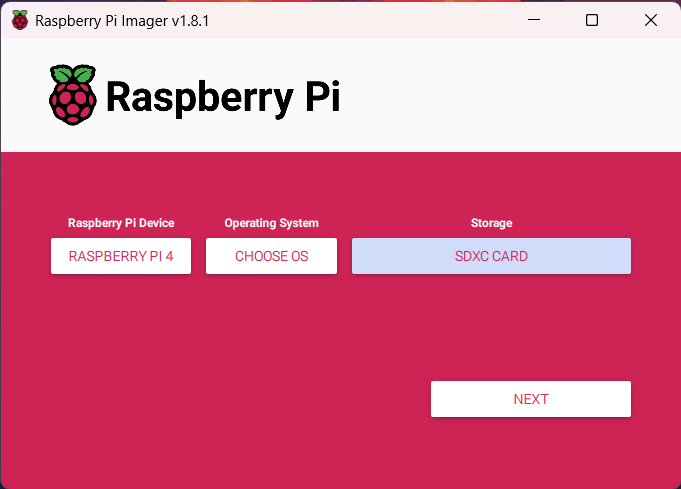
Step 3: Open the Imager and give the administrative privileges and select raspberry pi board according to your raspberry pi version.

Step 4: Next choose the OS Raspberry Pi OS Lite (64 bit).

Note We are using Lite version means only CLI is available. If you want to access it through GUI use Full or normal 64 bit version. But you will need monitor, keyboard, mouse & connectors to access and use GUI.
Step 5: Now insert the micro-SD card into your computer/laptop. Then select the choose storage and select your SD card properly.
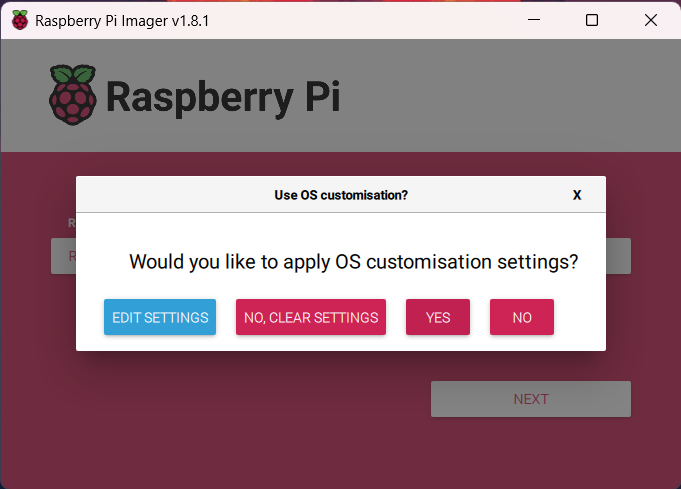
Step 6: After that it will ask for “Would you like to apply OS customization settings?” click on edit settings.
Step 7: Enable the following options as shown in the picture and set the following things
- Username & password.
- Wi-Fi name(SSID) & password.
- Time zone & keyboard layout.

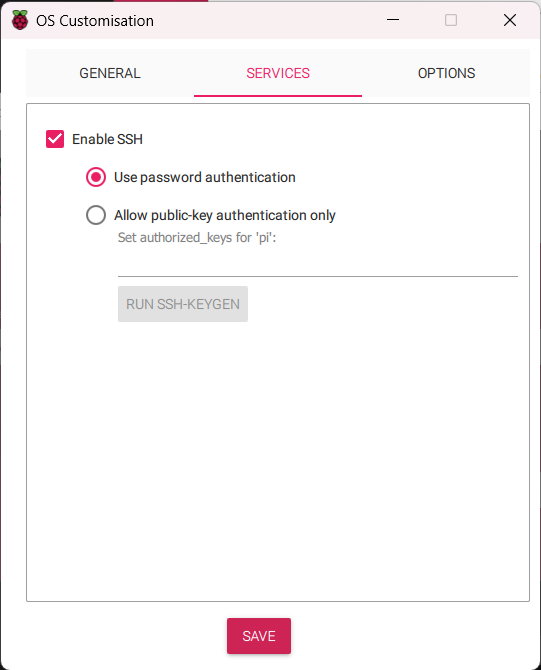
Now go to service tab, enable ssh and turn on “Use password authentication” option on as follows:
All the data on the micro SD card will be erased. So select the SD card carefully and take backup of micro SD card before proceeding
After that click on “Yes” on warning.

let it complete the flash. (could take 5-10 min depending on SD card read/write speed).
Step 8: After that insert the SD card in raspberry pi and boot (start) it. If you have monitor and keyboard setup the boot and open the terminal. And if you are following the steps given then search for IP address of raspberry pi in network through any network scanner or open the router dashboard and get the IP address of raspberry pi from there and run the following command to connect to it with command line.
Here username is which you given already before flashing SD card and IP address of raspberry pi.

If you are connecting for first time it will ask for “continue connecting?” then type yes and hit enter and enter the password you set in the previous step.
Note If you didn’t set any password then the default username is pi and password is raspberry.
Step 9: Then execute the following command to update & upgrade system.

This will update all the packages to their latest version.
Step 10: Execute the following command to install required packages for opencanary.
sudo apt install python3-dev python3-pip python3-virtualenv python3-venv python3-scapy libssl-dev libpcap-dev

Install & configure Opencanary on Raspberry Pi
Step 1: Execute the following command to install opencanary.

After that execute the following command to create a configuration file of opencanary
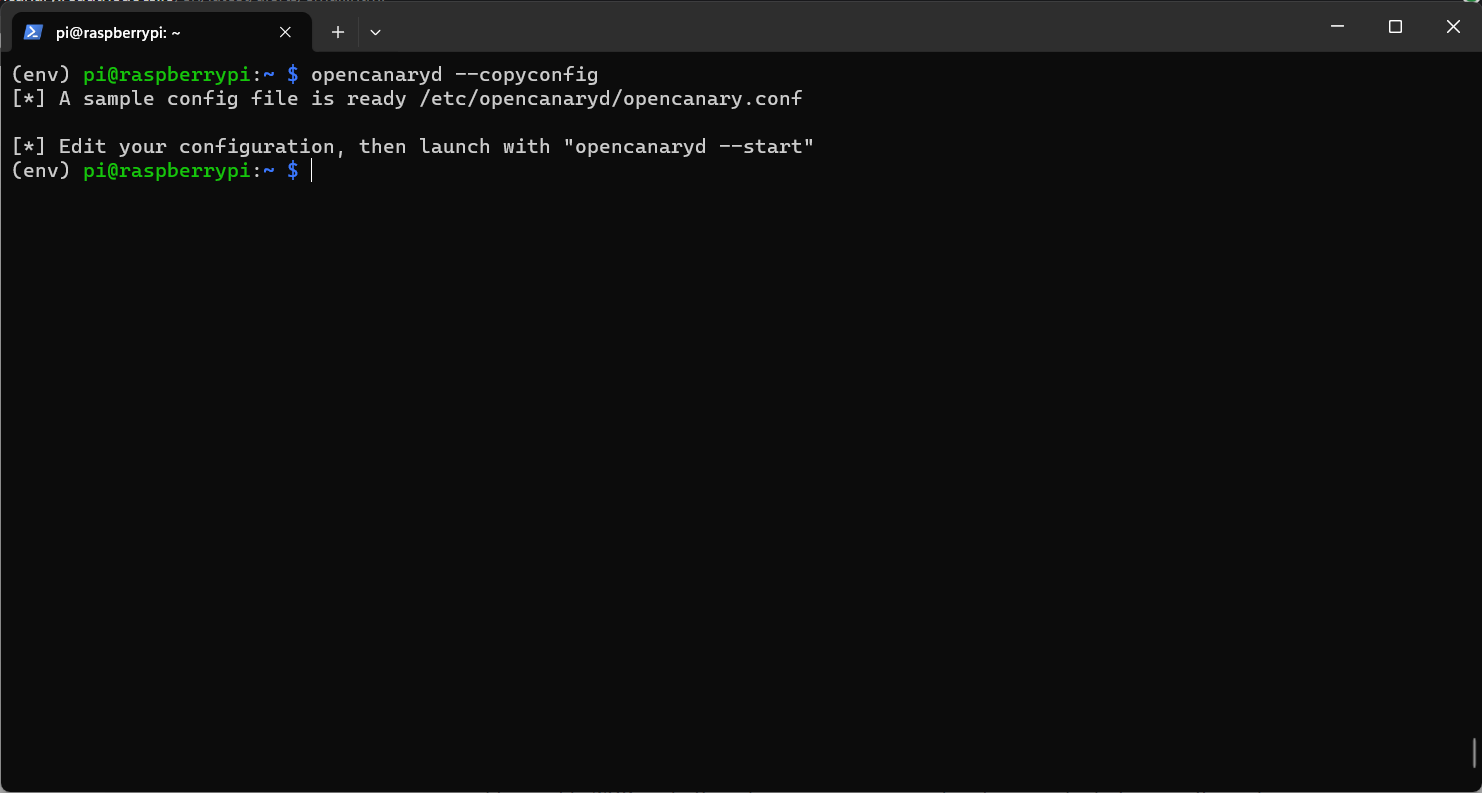
This will create a file name opencanary.conf in the /etc/opencanaryd/ directory.
Step 2: Now execute following command to edit that configuration file.
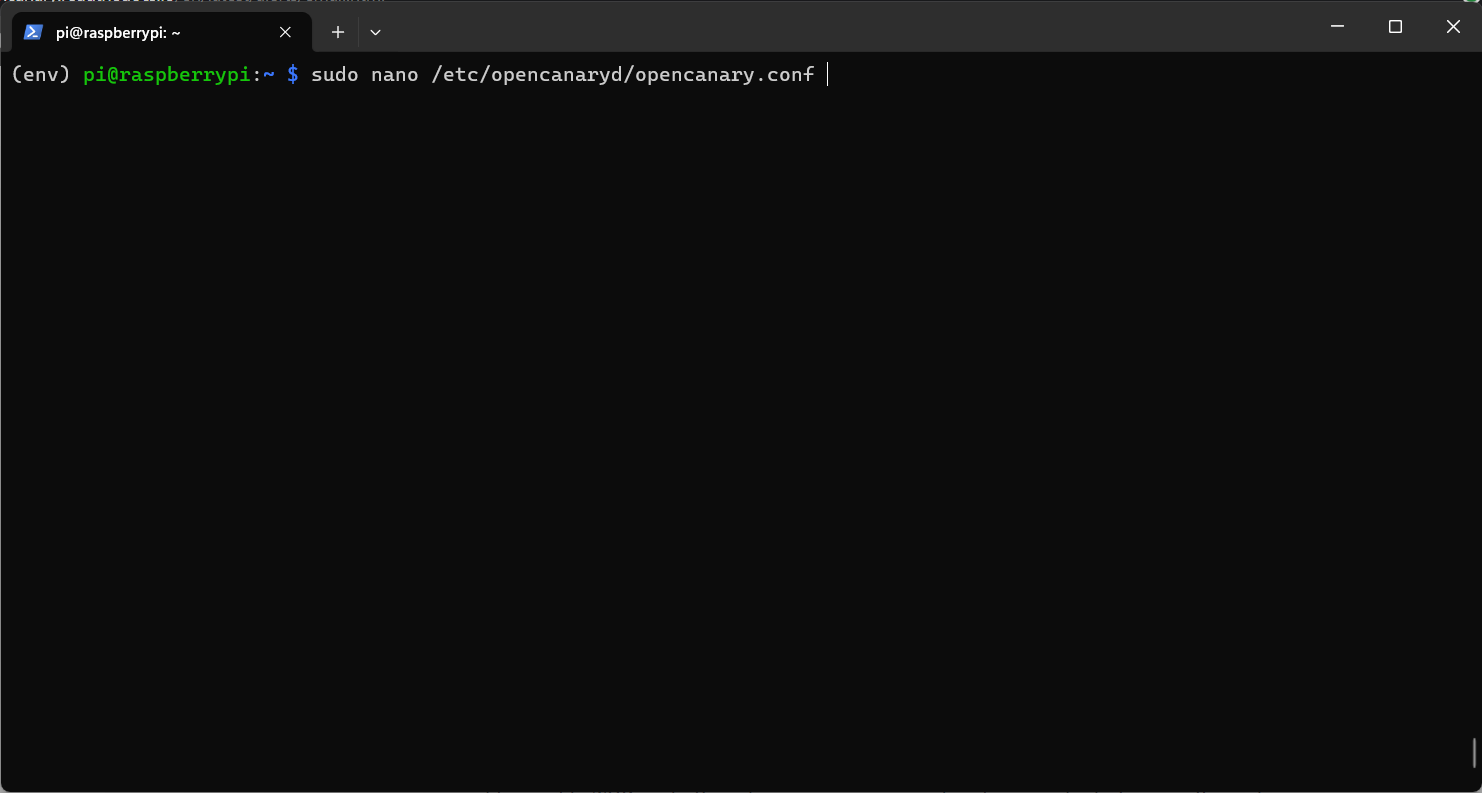
The command will open the file in nano text editor. Here you can configure the honeypot configuration like what services should be on, on what port should they run etc.

Step 3: Here set “http.enabled” : true to set fake http server on. Now press CTRL + S to save & CTRL + X to exit from nano.

Step 4: Now we need to setup your mail in order to get alerts on email. Add the following lines in the configuration file “handlers” section as follows:
"SMTP": {
"class": "logging.handlers.SMTPHandler",
"mailhost": ["smtp.gmail.com", 587],
"fromaddr": "noreply@yourdomain.com",
"toaddrs" : ["youraddress@gmail.com"],
"subject" : "OpenCanary Alert",
"credentials" : ["youraddress", "app password"],
"secure" : []
},

Note Create a new sperate gmail for raspberry pi opencanary. As this is risky to set an main gmail as opencanary alert gmail. Because if attacker compromised the honeypot they can get access to your gmail.
Replace the following data before saving configuration:
- “fromaddr” : set to your opencanary gmail.
- “toaddrs” : set to gmail on which you want to receive alerts.
- “credentials” : [ “fromaddr”, “app password“]
here are the steps to get app password.
Note If you see the following error message while starting opencanary. Just open configuration file again and check if there is brackets or commas are missing and add them if missing.
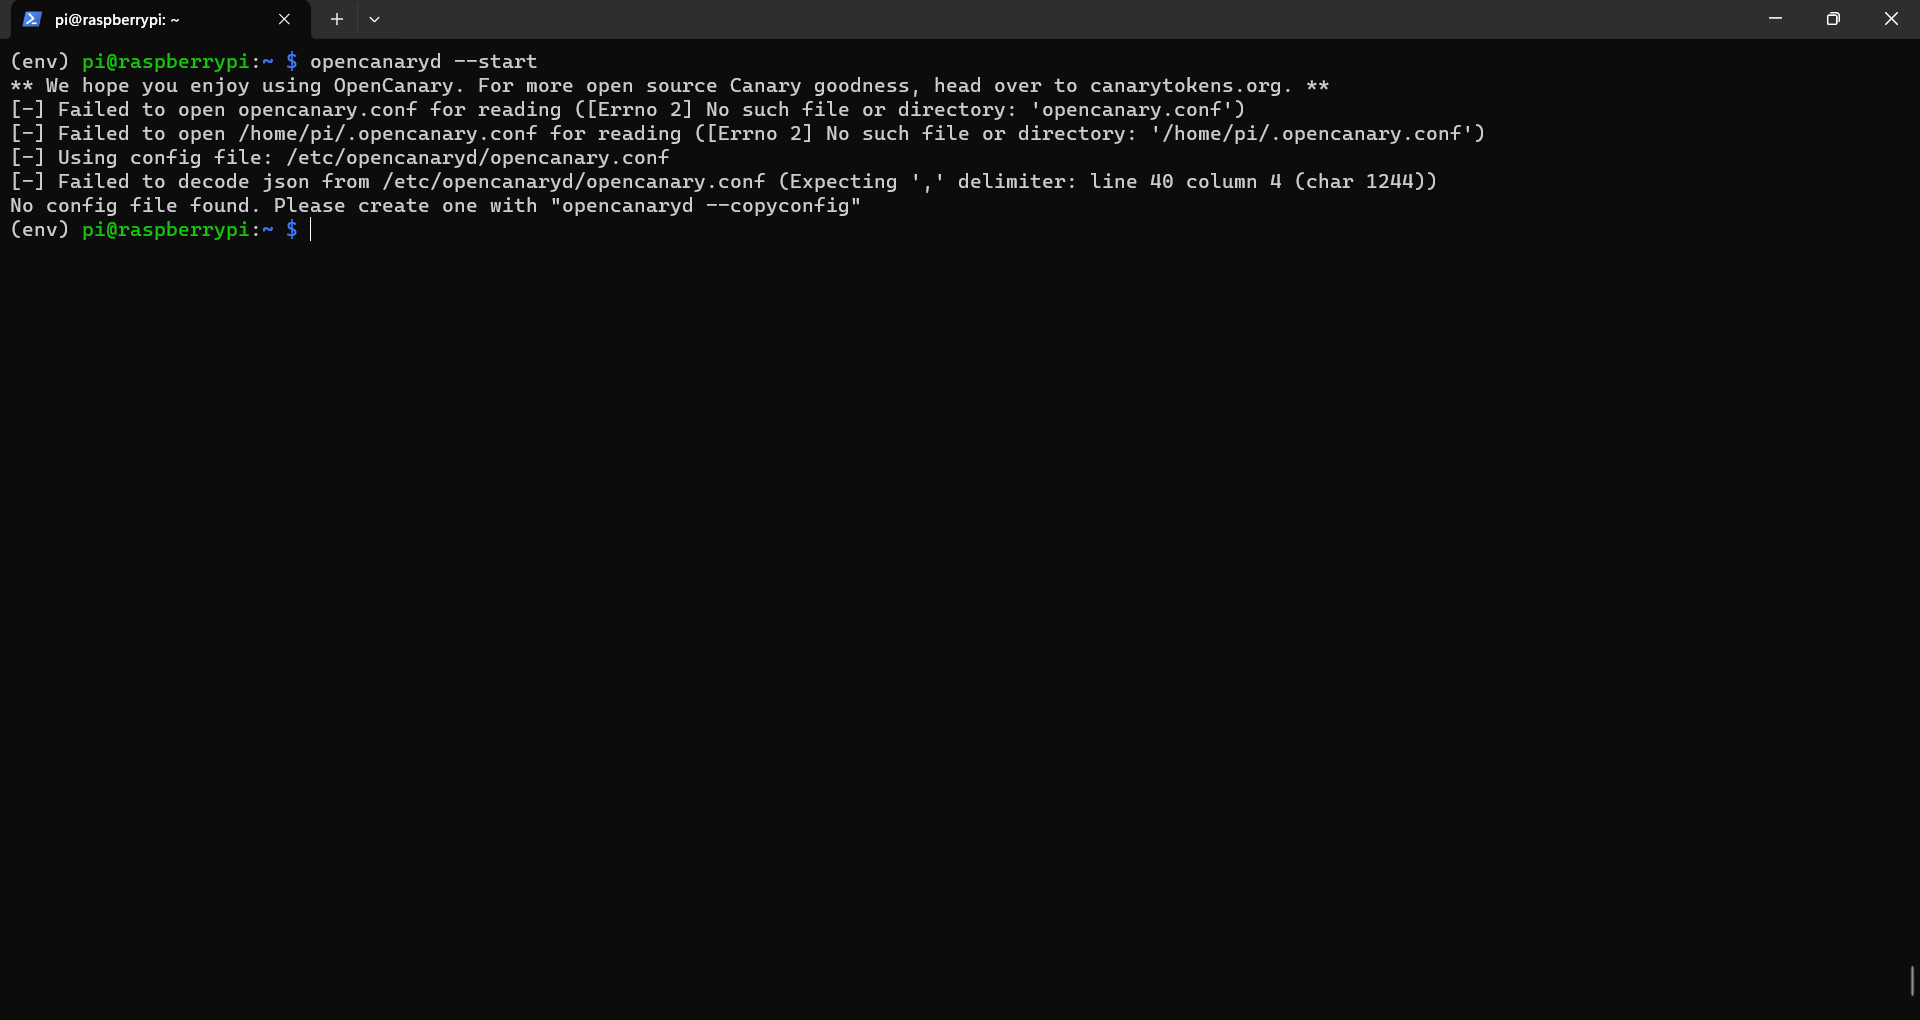
Step 5: After this we will start our opencanary setup by using following command:

We can see in the log which services are started. To test it is working or not, try login through FTP with random username & password and see if you get alerts on your gmail with username & password.
Step 6: Now test opencanary by trying to login through FTP with fake username and password. Opencanary will automatically send alerts on your gmail as follows:

Configure auto start opencanary on boot
Step 1: Create a file using nano in /etc/systemd/system directory as following command and paste the data in it.
Description=OpenCanary honeypot
After=syslog.target
After=network.target

[Service]
User=pi
Restart=no
Type=oneshot
RemainAfterExit=yes
Environment=VIRTUAL_ENV=/home/pi/env/
Environment=PATH=$VIRTUAL_ENV/bin:/usr/bin:$PATH
WorkingDirectory=/home/pi/env/bin
ExecStart=/home/pi/env/bin/opencanaryd --start

[Install]
WantedBy=multi-user.target
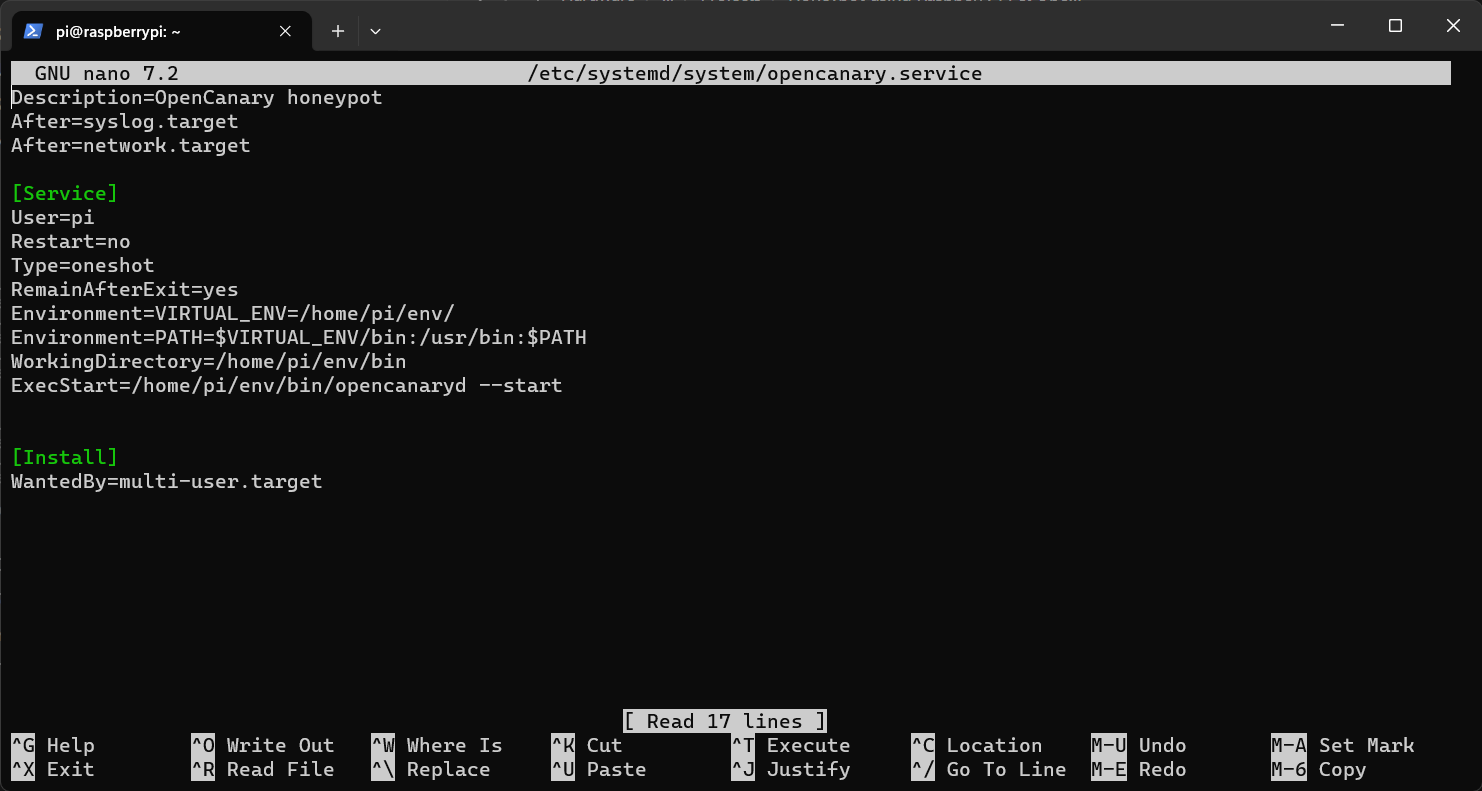
Now press CTRL + S to save & CTRL + X to exit from nano.
Note: If you want services like ssh, smb, etc. to be running fake then set the User=root to get the alerts on gmail or else it will not send any alerts regarding those services.
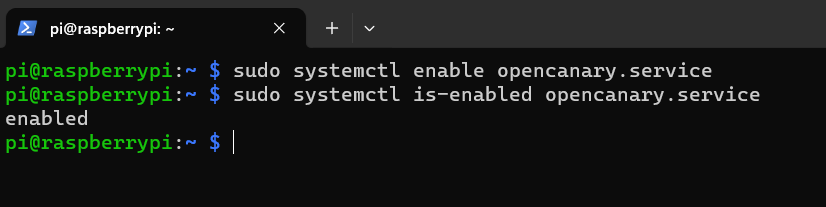
Step 2: After saving file execute the following command to enable service on system boot & start the service to test.
1. To enable service.
To check it is enabled or not execute the following command:
2. To start the service.
To check it is started or not execute the following command:
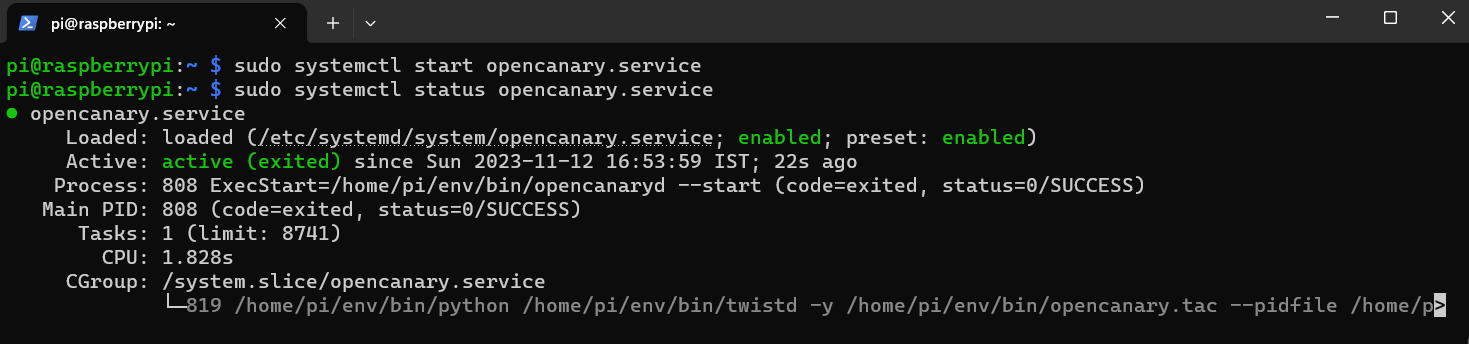
3. Now reboot the raspberry pi by using the command sudo reboot . And test the services which you started on opencanary by sending random inputs and see if you get alerts on gmail or not.
Summary
In conclusion, using a Raspberry Pi as a honeypot with OpenCanary offers an economical and flexible solution for enhancing cybersecurity defenses. By emulating various services and attracting potential attackers, this setup provides early threat detection, valuable insights into attack techniques, and contributes to collaborative threat intelligence. The straightforward installation process, coupled with the versatility of Raspberry Pi, makes this approach accessible for both enthusiasts and small businesses. Monitoring OpenCanary logs allows users to gain a deeper understanding of the evolving threat landscape, while ethical deployment and compliance with legal considerations ensure responsible cybersecurity practices. Ultimately, deploying a Raspberry Pi as a honeypot using OpenCanary is an educational and effective strategy for bolstering overall security posture.